The AxiDraw software, including the Inkscape plug-in, the AxiDraw CLI, and the Python module, offers a pretty neat way to control the plotting process with special escape codes in layer names. vpype doesn’t have an explicit support for this feature yet, but it can give arbitrary names to layers using the name command—including ones that the AxiDraw understands.
This article explores the topic of layers, their name, and how they can be used to control the AxiDraw plotting process.
SVG has layers?
Actually, no.
Instead, SVG has groups, which can be nested or omitted altogether, which is not exactly the same thing. For this reason, the Inkscape project has introduced an XML namespace named inkscape to support its layer feature. Amongst other thing, it defines the inkscape:groupmode="layer" group attribute, to mark a top-level group as layer, and the inskscape:label attribute, to assign a label—or name—to the layer:
<?xml version="1.0" encoding="utf-8" ?>
<svg xmlns="http://www.w3.org/2000/svg"
     xmlns:inkscape="http://www.inkscape.org/namespaces/inkscape"
     height="10.0cm" width="10.0cm">
  <g inkscape:groupmode="layer" inkscape:label="my layer label" >
      <!-- first layer's content -->
  </g>
  <g inkscape:groupmode="layer" inkscape:label="my other layer" >
      <!-- second layer's content -->
  </g>
</svg>
The Inkscape extension has become the de facto standard for SVG layer definition and naming, and is used by both vpype and the AxiDraw software.
vpype has layers?
Yes.
Layers are first-class citizens in vpype, and, like any good citizen, they are primarily identified by a non-zero, positive integer identification number, in this case called “layer ID”. When loading an SVG, vpype try to construct its layer based on their Inkscape label, if any, their SVG group id (<g id="...">) if any, or sequentially otherwise. For example, when reading an Inkscape file with two layers named “layer 4” and “some layer 6”, vpype will assign layer IDs 4 and 6 to these layers1. If the label and group ID lack numerical digits, then vpype will revert to using sequential IDs.
One of the easiest ways to visualise layers and their IDs is to use the show and the viewer’s layer menu:
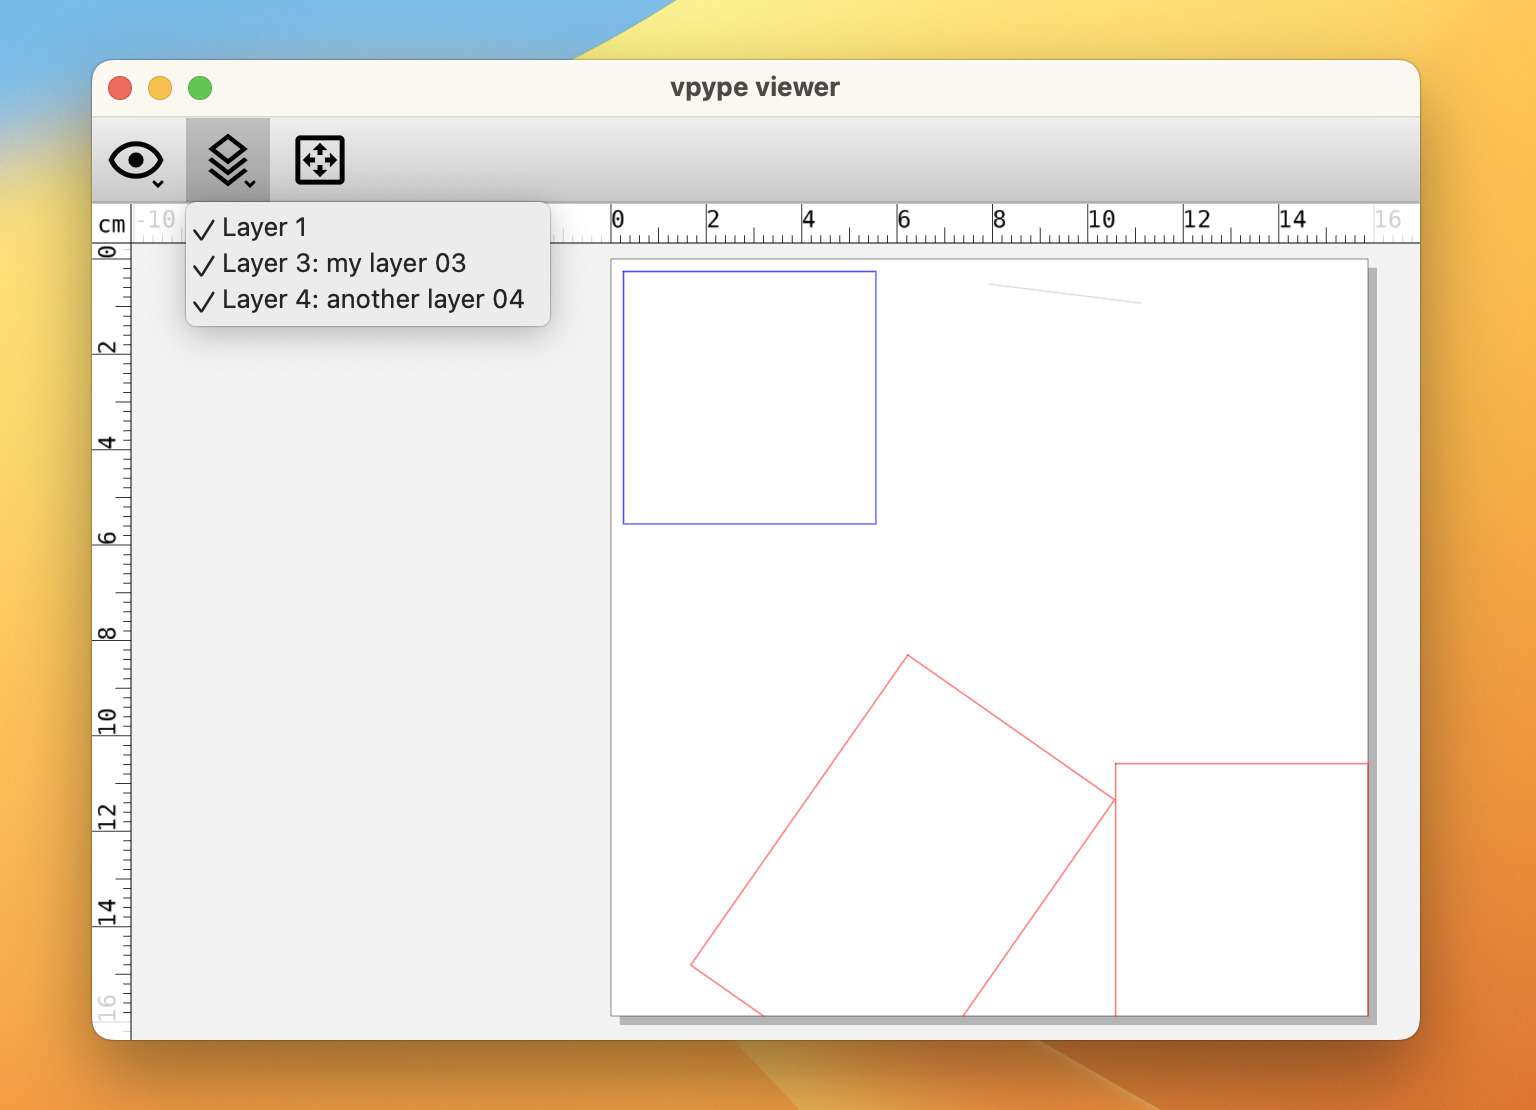
Both the layer ID and the label, if any, is shown.
Many vpype commands operate on a layer-by-layer basis. They are known as layer processors. By default, they operate on all layers—for example translate 0 2cm translates the whole document by 2 cm vertically. For more control, the exact layer(s) on which the command should operate can be specified using the --layer LID option (or -l LID for short). For example, translate -l 3 0 2cm will translate only layer 3. Likewise, translate -l 3,4 0 2cm will translate both layer 3 and 4.
AxiDraw escape codes
The EMSL wiki contains a thorough description of the supported escape codes and their effect. Here is a summary of what can be achieved:
- By prefixing the layer name with a number in the range of 0 to 1000, layers can be grouped together and enabled/disabled by the AxiDraw software (this resembles, but is not to be confused with vpype’s layer IDs). For example,
10 my layerassigns the number 10 to the corresponding layer. With the “Layer” tab of the InkScape extension, it is possible to plot all layers prefixed with a given number. - The pen down position can be adjusted by adding
+Himmediately followed by a number right after the layer number, e.g.10+H55 my layersets the pen down position to 55. This works without layer number as well, e.g.+H55 my layer. - Likewise, the pen down speed can be adjusted with
+S, e.g.12+S30 my layer. - Another possibility is to set a delay at the beginning of a layer using
+D. This enables behaviours such as letting time for the ink to dry, or for a timelapse picture to be taken. - A layer may be marked as “do not plot” by adding
%at the beginning of the layer name. This could be used to add debug elements or decorations to an SVG that should not be physically plotted. - Likewise, starting the layer name with
!will force the AxiDraw to pause, for example to allow for paper swapping.
Naming layers
Equipped with this understanding of how layers work, let’s use the name command to control the AxiDraw. For example, the drawing speed for layer 3 can be specified this way:
vpype read multilayer.svg name -l 3 "+S30 my layer label" write output.svg
vpype 1.13 introduced a new lid built-in expression variable which comes in handy in this context. It can be used to match the AxiDraw layer number with vpype’s layer ID:
vpype read multilayer.svg name -l 3 "%lid%+S30 my layer label" write output.svg
In this case, layer 3 is renamed “3+S30 my layer label”. The nice thing is that this also works when renaming multiple layers at once. For example:
vpype read multilayer.svg name -l 3,4 "%lid%+S30" write output.svg
Here, layer 3 and 4 are renamed “3+S30” and “4+S30”, respectively.
Empty layers
To achieve certain behaviours with the AxiDraw, one may need to insert any empty layer with a specific name. For example, a final empty layer named “+D1000” makes the AxiDraw pause for one second in pen-up position at the final drawing location, before moving the head back to the home position.
Interestingly, there is currently no explicit support in vpype to create empty layers. The layer manipulation commands (like lmove, lcopy, etc.) specifically remove layers they leave empty.
While preparing this article, I realised that one command could be used to create an empty layer: random. Its purpose is to generate some random lines for debugging purposes, but the number of lines it generate can luckily be controlled. So here is how to create an empty layer with ID 5:
vpype [...] random -l 5 -n 0 [...]
The -n 0 option tells random to generate 0 random lines, but it still creates the layer. This can be verified using the stat command:
vpype random -l 5 -n 0 stat
This prints the following output:
========= Stats =========
Current page size: None
Layer 5
  Length: 0
  Pen-up length: 0.0
  Total length: 0.0
  Mean pen-up length: 0.0
  Median pen-up length: 0.0
  Path count: 0
  Segment count: 0
  Mean segment length: n/a
  Bounds: None
  Properties:
Totals
  Layer count: 1
  Length: 0.0
  Pen-up length: 0.0
  Total length: 0.0
  Path count: 0
  Segment count: 0
  Mean segment length: n/a
  Bounds: None
  Global properties:
=========================
Layer 5 exists, but is empty.
That about wraps up what can be said on vpype layers, their names, and how they can interact with the AxiDraw. I’d love to hear about your creative use of these features, in the comments or on the socials.
-
Note that vpype 1.13 introduced a minor change on how exactly this is done. ↩︎